Category Archives: Baked Goods

French Vanilla Cupcakes

Standard

This recipe is the result of a lot of experimenting and taste tests!

French Vanilla Cupcakes

Ingredients

  • 1 cup whole milk, at room temperature
  • 3 large eggs, at room temperature
  • 2 teaspoons french vanilla blend extract
  • 1 teaspoon vanilla extract
  • 2 1/4 cups cake flour
  • 1½ cups granulated sugar
  • 4 teaspoons baking powder
  • 1 teaspoon table salt
  • 12 tablespoons unsalted butter (1½ sticks), softened
  • 1 small package, french vanilla pudding

Directions

1. Set oven rack in middle position. Heat oven to 350 degrees.

2. Pour milk, eggs, and extracts into a small bowl and mix with fork until blended.

3. Mix cake flour, sugar, baking powder, and salt in bowl of electric mixer at slow speed. Add butter; continue beating at slow speed until mixture resembles moist crumbs.

4. Add the milk mixture to crumbs and beat at medium speed (or high speed if using handheld mixer). Add pudding and mix.

5. Fill cupcake liners about 2/3 full. (I used an ice cream scoop to keep them even.) Bake until thin skewer or toothpick inserted in the center comes out clean, 15-17 minutes.

Sugar Cookies with Royal Icing

Standard

In the past few months, I’ve made a lot of cut out sugar cookies (see pics below). This is the recipe that I settled on after making a few variations of the original recipe.  I am in love with this recipe. 🙂

Sugar Cookies

Ingredients

  • 1 cup butter
  • 1 cup powdered sugar
  • 1/2 cup granulated sugar
  • 1 egg, beaten
  • 1  t. almond extract
  • 1 ½ t. vanilla
  • 1 t. salt
  • 2 ½ c. sifted flour

Directions
Cream butter. Add sugars. Blend in egg, almond extract, vanilla, salt and flour. Chill dough until firm. Roll to ¼” thickness on well-floured surface. Cut with cookie cutters. Place on greased cookie sheets. Bake at 375° for 8-10 min. Cookies should not brown. Frost and decorate when cool.

Royal Icing
Ingredients

  • 4 cups powdered sugar, sifted
  • 2 tbsp. meringue powder
  • 5 tbsp. water
  • 1 tsp. vanilla extract

Directions
Combine all ingredients in the bowl of a stand mixer fitted with the paddle attachment.  Mix on low speed until the sheen has disappeared and the icing has a matte appearance (about 7-10 minutes).  Transfer the contents of the mixing bowl to an air-tight container.  This will be the stiffest consistency of the icing, and at this point it is still too stiff to use for decorating.  Add water a very small amount at a time and stir by hand until fully incorporated.  Continue until the icing has reached a consistency appropriate for piping.  (Remember, if you are having any difficulty piping, it is still too thick.  Add a little more liquid and try again.)  Using a pastry bag, pipe around the edges of each cookie.  Let stand so the icing will set.  Make sure to keep the leftover icing covered at all times when not in use so that it does not begin to harden.

Once all the cookies have been edged, transfer some of the remaining icing to a separate air-tight container.  Thin out by incorporating a small amount of water at a time, until the icing drips off the spoon easily when lifted and then smooths in with that still in the bowl.  If you go too far and the icing is too thin, add more sifted powdered sugar to thicken it again.  Once the icing has reached the desired consistency, transfer it to a squeeze bottle (or a plastic bag with a hole in one corner), and flood the area surrounded by the piping on each cookie.  If it does not completely spread to the edges, use a toothpick to help it along.  *Allow to set.

Use the remaining thicker icing for piping decoration as desired.  Gel icing color is best as it does not add a significant amount of liquid.  Liquid food coloring can be used as well – add powdered sugar as needed to compensate for any thinning that occurs.

Here are a few pics of my recent cookie designs…

Buttermilk Pie Bars

Standard

I bought some buttermilk this week and planned to make my regular buttermilk pie.  Then, completely by accident, I came across this recipe and had to try them.  A new twist to Scott’s favorite pie. 🙂

Buttermilk Pie Bars
Crust
1/3 cup sugar
1/2 cup butter, softened
1 1/2 cups all purpose flour
1/4 tsp salt

Filling
3/4 cup + 2 tbsp sugar
3 tbsp all purpose flour
1/4 tsp salt
4 large eggs
1 tsp vanilla extract
1/4 tsp nutmeg, freshly grated
2 tbsp butter, melted and cooled
2 cups buttermilk

Preheat oven to 350F.
Lightly grease a 9×13-inch baking pan (or used the Baker’s Edge).
Begin by making the crust. In a large bowl, cream together sugar and butter, until smooth and fluffy. Working at a low speed, gradually beat in flour and salt until mixture is crumbly. Pour mixture into prepared pan and press into an even layer.
Bake for 15-17 minutes, until it just begins to turn golden brown.
While the crust bakes, prepare the filling.
In a large bowl, or the bowl of a food processor, combine all filling ingredients and whisk (or pulse) until mixture is well combined and very smooth.
When crust is done, pour the filling into the hot crust and return to oven.
Bake for 25-30 minutes, or until filling is just set. Cool bars on a wire rack. Chill before slicing.

Serves 16

From: baking bites

Strawberry Cupcakes

Standard


A few years ago, I modified a strawberry cupcakes recipe that started with white cake mix.  They were really good!  But then I lost the recipe.  Recently, my friend Kim found it but in the meantime we’d decided to do a comparison of several recipes and decide which one we liked best.  This recipe is different from most strawberry cake or cupcakes in that it truly tastes like fresh strawberries.  It’s basically a really moist yellow cake with fresh strawberries folded into the batter.  I pulsed the strawberries in the food processor a few times (instead of chopping them) and was happy with the results.  I did not top them with strawberry frosting.  I used my regular buttercream and just added a little pink coloring to it.  I actually planned to add a small amount of pureed strawberries to it and a few slices on top but I ran out of strawberries.  This was okay though because I don’t usually care for frosting that is the same flavor as the cake unless it’s vanilla on vanilla. 🙂

Stay tuned for the next recipe test!

Strawberry Cupcakes

Yield: about 18 cupcakes

Ingredients:
2 ½ cups cake flour
1 tsp. baking soda
¼ tsp. salt
½ cup unsalted butter
1 ½ cups sugar
2 eggs
1/3 cup buttermilk
¼ cup oil
1 tsp. vanilla extract
2 cups chopped strawberries

Directions:
Preheat the oven to 350°.  Line cupcake pans with paper liners.

Sift flour, salt and baking soda into a medium bowl.  Set aside.  In the bowl of an electric mixer, cream butter and sugar until light and fluffy.  Add eggs one at a time until combined.  Add buttermilk, oil and vanilla and beat until combined.  Add flour mixture and stir until just combined.  Fold in chopped strawberries.  Fill cupcake wells ¾ full with batter.  Bake for 20 minutes or until a toothpick inserted in the center comes out clean. Cool completely on a wire rack.

From: Annie’s Eats

Onesie Sugar Cookies

Standard

I’ve made royal icing twice before but all I did was spoon it onto regular round sugar cookies and put sprinkles on them.  I’ve been avoiding making royal icing decorated cookies like these.  Every time I would get ready to try them a little voice in my head would yell, “It’s too complicated! It’s too time consuming!”

Well, I finally did it!

And- they are time consuming but worth the effort.  Especially for a special event or occasion.  And what better occasion than to celebrate one of my dear friends, Sonya, and the impending arrival of her new baby girl? She and her husband Greg will soon welcome their second daughter into the world.  These cookies were for their baby sprinkle.

I still don’t know if I would have tried these if it weren’t for the inspiration provided by Annie, author of the amazing blog, Annie’s Eats.  She makes beautiful food and desserts and shares great tips on how to try them yourself.  Her blog is a must read. If you want to make cookies with royal icing, check out her detailed royal icing tutorial.  The only other tip I have is- get a squeeze bottle! I will never attempt to flood cookies with royal icing without one.

As much as I like to save time in the kitchen (and these do not, I repeat NOT, save time) I will definitely make these again because you have to keep practicing in order to get better at them.  I only wish I’d tried them sooner so that I could feel more confident in making them for the party.  But I am pretty happy with them, for my first attempt!  I have a few other shapes/designs in mind now so stay tuned! 🙂

White Sugar Cookies
Ingredients:
1 cup butter
1 cup powdered sugar
1 egg, beaten
1 ½ t. almond extract
1 t. vanilla
1 t. salt
2 ½ c. sifted flour

Directions:
Cream butter. Add powdered sugar. Blend in egg, almond extract, vanilla, salt and flour. Chill dough until firm. Roll to ¼” thickness on well-floured surface. Cut with cookie cutters. Place on greased cookie sheets. Bake at 375° for 8-10 min. Cookies should not brown. Frost and decorate when cool. *Yields ~40 cookies.

*How many cookies you will get depends on their size and thickness. I made a double batch of this recipe expecting to have about 80 cookies but only ended up with 55.

From: Annie’s Eats

Royal Icing
Ingredients:
4 cups powdered sugar, sifted
2 tbsp. meringue powder
5 tbsp. water

Directions:
Combine all ingredients in the bowl of a stand mixer fitted with the paddle attachment.  Mix on low speed until the sheen has disappeared and the icing has a matte appearance (about 7-10 minutes).  Transfer the contents of the mixing bowl to an air-tight container.  This will be the stiffest consistency of the icing, and at this point it is still too stiff to use for decorating.  Add water a very small amount at a time and stir by hand until fully incorporated.  Continue until the icing has reached a consistency appropriate for piping.  (Remember, if you are having any difficulty piping, it is still too thick.  Add a little more liquid and try again.)  Using a pastry bag, pipe around the edges of each cookie.  Let stand so the icing will set.  Make sure to keep the leftover icing covered at all times when not in use so that it does not begin to harden.

Once all the cookies have been edged, transfer some of the remaining icing to a separate air-tight container.  Thin out by incorporating a small amount of water at a time, until the icing drips off the spoon easily when lifted and then smooths in with that still in the bowl.  If you go too far and the icing is too thin, add more sifted powdered sugar to thicken it again.  Once the icing has reached the desired consistency, transfer it to a squeeze bottle (or a plastic bag with a hole in one corner), and flood the area surrounded by the piping on each cookie.  If it does not completely spread to the edges, use a toothpick to help it along.  *Allow to set.

Use the remaining thicker icing for piping decoration as desired.  Gel icing color is best as it does not add a significant amount of liquid.  Liquid food coloring can be used as well – add powdered sugar as needed to compensate for any thinning that occurs.

From: Annie’s Eats

*I let the cookies set for 4 hours or so before adding details.  Then I let the final cookies set over night before packaging.

July 17, 2010 update!!!

I was asked to make some more onesie cookies for a boy baby shower.  The colors were blue, green, brown and white. Here’s the result!

Note: For the boy onesie cookies, I added vanilla extract to the icing to give it a little more flavor.  I will continue to test different variations of flavoring- like lemon to the cookie dough or almond to the icing.  Oh, the possibilities. 🙂

August 12, 2010 Update

Alright, after trying  this recipe several times with small changes each time, I’ve settled on my favorite version.  These slight changes resulted in cookies that were a huge hit at a recent birthday party:  I added half a cup of granulated sugar and used 1 teaspoon of almond extract and 1 1/2 teaspoons of vanilla extract.  I am basically in love these cookies. 🙂

Also, using lemon extract instead of almond to make lemon sugar cookies was delicious!! I didn’t have a  real lemon to use to add lemon zest but they still came out great just with the flavoring. Yum!!

White Cupcakes with Buttercream

Standard

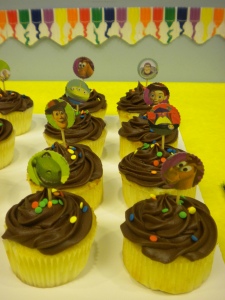
I made these cupcakes for Austin’s 4th birthday and they turned out great.  The almond extract really gives them a nice flavor. I will probably try them again with just vanilla but these were delicious and very well received at the party. They were the exact texture that I was looking for. Easy recipe and they bake fast!

White Cupcakes

Ingredients

  • 1 cup + 2 tablespoons whole milk, at room temperature
  • 6 large egg whites (¾ cup), at room temperature
  • 2 teaspoons almond extract
  • 1 teaspoon vanilla extract
  • 2 1/4 cups cake flour
  • 1½ cups + 2 tablespoons granulated sugar (11.35 ounces)
  • 4 teaspoons baking powder
  • 1 teaspoon table salt
  • 12 tablespoons unsalted butter (1½ sticks), softened but still cool

Directions

1. Set oven rack in middle position. Heat oven to 350 degrees.

2. Pour milk, egg whites, and extracts into 2-cup glass measure, and mix with fork until blended.

3. Mix cake flour, sugar, baking powder, and salt in bowl of electric mixer at slow speed. Add butter; continue beating at slow speed until mixture resembles moist crumbs, with no powdery streaks remaining.

4. Add all but ½ cup of milk mixture to crumbs and beat at medium speed (or high speed if using handheld mixer) for 1½ minutes. Add remaining ½ cup of milk mixture and beat 30 seconds more. Stop mixer and scrape sides of bowl. Return mixer to medium (or high) speed and beat 20 seconds longer.

5. Fill cupcake liners about 2/3 full. (I used an ice cream scoop to keep them even.) Bake until thin skewer or toothpick inserted in the center comes out clean, 15-17 minutes.

Makes 24 cupcakes

From: That’s The Way the Cookie Crumbles

This is the buttercream recipe that I’ve used before but never posted. 🙂

Wilton’s Buttercream Icing

Ingredients:

  • 1/2 cup solid vegetable shortening
  • 1/2 cup (1 stick) butter or margarine softened
  • 1 teaspoon clear vanilla extract
  • 4 cups sifted confectioners’ sugar (approximately 1 lb.)
  • 2 tablespoons milk

Makes: About 3 cups of icing.

instructions

(Medium Consistency)

In large bowl, cream shortening and butter with electric mixer. Add vanilla. Gradually add sugar, one cup at a time, beating well on medium speed. Scrape sides and bottom of bowl often. When all sugar has been mixed in, icing will appear dry. Add milk and beat at medium speed until light and fluffy. Keep bowl covered with a damp cloth until ready to use.

For best results, keep icing bowl in refrigerator when not in use. Refrigerated in an airtight container, this icing can be stored 2 weeks. Rewhip before using.

For thin (spreading) consistency icing, add 2 tablespoons light corn syrup, water or milk.

For Pure White Icing (stiff consistency), omit butter; substitute an additional 1/2 cup shortening for butter and add 1/2 teaspoon No-Color Butter Flavor. Add up to 4 tablespoons light corn syrup, water or milk to thin for icing cakes.

From: Wilton

I also topped these cupcakes with Hershey’s Perfectly Chocolate chocolate frosting and they turned out very well.


Cake Mix Sugar Cookies

Standard

While I love the homemade cookies I made last Christmas, I just didn’t have the time for them this year since we were hosting a Christmas Eve party which I prepared for while also taking care of Shania, Austin, and Landon. Everything else I made was from scratch so I had to take a short cut somewhere! These are so easy and delicious.

Cake Mix Sugar Cookies

Ingredients

  • 1 box Pillsbury white cake mix
  • 2 eggs
  • 1/3 cup oil
  • granulated sugar, sprinkles and/or frosting
  • Directions

    Preheat oven to 350. Combine cake mix, oil, and eggs; stir with spoon until thoroughly moistened.  Shape dough into 1 inch balls. Place 2 inches apart on ungreased cookie sheets. Flatten to 1/4 thickness with the bottom of a glass dipped in flour. Sprinkle with sugar or sprinkles.  Or bake plain and top with frosting later. Bake for 6 to 8 minutes or until edges are a light golden brown.

    Red Velvet Cake with Cream Cheese Buttercream Frosting

    Standard

    I haven’t made red velvet cake in a couple years and tried a new recipe this time from Joy of Baking.  It came out very well! Nice and moist. The frosting recipe, from Martha Stewart, came out very pretty and creamy.

    Cake Ingredients

    2 1/2 cups (250 grams) sifted cake flour

    1/2 teaspoon salt

    2 tablespoons (15 grams) Dutch-processed cocoa powder

    1/2 cup (113 grams) unsalted butter, at room temperature

    1 1/2 cups (300 grams) granulated white sugar

    2 large eggs

    1 teaspoon pure vanilla extract

    1 cup (240 ml) buttermilk

    2 tablespoons liquid red food coloring

    1 teaspoon white distilled vinegar

    1 teaspoon baking soda

    Cake Directions

    Preheat oven to 350 degrees F (175 degrees C) and place rack in center of oven. Butter two – 9 inch (23 cm) round cake pans and line the bottoms of the pans with parchment paper. Set aside.

    In a mixing bowl sift together the flour, salt, and cocoa powder. Set aside.

    In bowl of your electric mixer, or with a hand mixer, beat the butter until soft (about 1-2 minutes). Add the sugar and beat until light and fluffy (about 2-3 minutes). Add the eggs, one at a time, beating well after each addition. Scrape down the sides of the bowl. Add the vanilla extract and beat until combined.

    In a measuring cup whisk the buttermilk with the red food coloring. With the mixer on low speed, alternately add the flour mixture and buttermilk, in three additions, beginning and ending with the flour.

    In a small cup combine the vinegar and baking soda. Allow the mixture to fizz and then quickly fold into the cake batter.

    Working quickly, divide the batter evenly between the two prepared pans and smooth the tops with an offset spatula or the back of a spoon. Bake in the preheated oven for approximately 25 – 30 minutes, or until a toothpick inserted in the center of the cakes comes out clean. Cool the cakes in their pans on a wire rack for 10 minutes. Place a wire rack on top of the cake pan and invert, lifting off the pan. Once the cakes have completely cooled, wrap in plastic and place the cake layers in the freezer for at least an hour. (This is done to make filling and frosting the cakes easier.)

    From: Joy of Baking

    Cream Cheese Buttercream Frosting
    Ingredients
  • 1 (8-ounce) package cream cheese, room temperature
  • 1/2 cup (1 stick) unsalted butter, room temperature
  • 1 (1-pound) box confectioners’ sugar
  • 1 teaspoon pure vanilla extract
  • Directions

  • Place cream cheese and butter in the bowl of an electric mixer fitted with the paddle attachment and beat until creamy, about 30 seconds.
  • With the mixer on low, slowly add sugar, scraping down the sides of the bowls as necessary.
  • Add vanilla and increase mixer speed to medium. Blend until frosting is fluffy, about 1 minute.
  • Cheesecake Squares

    Standard

    I’ve wanted to make cheesecake for a long time.  Well, I still haven’t made one but these squares were the next best thing.  The taste of cheesecake but a lot easier!

    Cheesecake Squares

    Ingredients

    Graham Cracker Crust:

    2 cups (200 grams) graham wafer crumbs or crushed digestive cookies

    2 tablespoons (30 grams) granulated white sugar

    1/2 cup (113 grams) unsalted butter, melted

    Cheesecake Filling:

    2 – 8 ounces (454 grams) cream cheese, softened

    1/2 cup (100 grams) granulated white sugar

    1 tablespoon fresh lemon juice

    1 teaspoon pure vanilla extract

    2 large eggs

    Directions

    Lemon Sugar Cookie Bars

    Standard

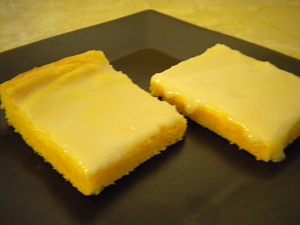
    These are made using the recipe for lemon sugar cookies and just spread into a pan instead of rolled into balls for cookies. Just a faster way to get the same great taste and texture of the cookies.

    These take about 12 minutes to bake in my oven at 350 degrees.  Instead of sprinkling these with sugar, I make a simple glaze using confectioner’s sugar and warm water. Slowly drizzle water into a few cups of sugar, mixing as you add it, until you get a nice glaze to drizzle over the bars while they are still warm.  Let set for a few minutes before cutting.  

    DSCN1161